I recently had a need to install Xen hypervisor on CentOS and most of the guides covered using the package maintainers version. Further, RHEL distributions favor using KVM. I did come across HowTo: Install XEN Dom0 on CentOS 6 from source but the domain was blocked (Google cache made quick work of getting around that issue) and there were a few steps that felt unclear. I took that guide and made a few changes which are reflected below. You may want to also reference the Xen Wiki CenOS 6.2, Xen 4.2.1, and Kernel version 3.9.2 were used in this example but newer and older versions should be similar.
First install dependencies:
yum groupinstall "Development Libraries"
yum groupinstall "Development Tools"
yum install transfig wget tar less texi2html libaio-devel dev86 glibc-devel e2fsprogs-devel gitk mkinitrd iasl xz-devel bzip2-devel
yum install pciutils-libs pciutils-devel SDL-devel libX11-devel gtk2-devel bridge-utils PyXML qemu-common qemu-img mercurial texinfo
yum install libidn-devel yajl yajl-devel ocaml ocaml-findlib ocaml-findlib-devel python-devel uuid-devel libuuid-devel openssl-devel
yum install glibc-devel.i686
yum install
libvirt python-virtinst
Download the latest Xen source package.
$ tar xzf xen-4.2.1.tar.gz
$ cd xen-4.2.1
$ ./configure
$ make xen && make tools && make stubdom
$ sudo make install xen
$ sudo make install xen-tools
$ sudo make install stubdom
Prevent the screen from powering off:
$ sudo sh -c "echo '/usr/bin/setterm -powersave off' >> /etc/rc.local"
Define the resources for domain 0:
$ sudo sh -c "echo 'xl sched-credit -d Domain-0 -w 512' >> /etc/xendom0caps"
$ sudo chmod +x /etc/xendom0caps
Start the services at boot:
sudo ln -s /etc/init.d/xendomains /etc/rc0.d/S10xendomains
sudo ln -s /etc/init.d/xendomains /etc/rc6.d/S10xendomains
sudo ln -s /etc/init.d/xendomains /etc/rc3.d/S98xendomains
sudo ln -s /etc/init.d/xencommons /etc/rc3.d/S98xencommons
sudo ln -s /etc/xendom0caps /etc/rc3.d/S97xendom0caps
Optionally for those that want to use the xm commands.
sudo ln -s /etc/init.d/xend /etc/rc3.d/S98xend
Make sure everything is going to start at the correct runlevel. Note that xend is optional
$ chkconfig --list |grep xen
xencommons      0:off   1:off   2:off   3:on    4:off   5:off   6:off
xend            0:off   1:off   2:off   3:on    4:off   5:off   6:off
xendomains      0:on    1:off   2:off   3:on    4:off   5:off   6:on
Make sure the weight is setup, this may vary depending your needs/resources available.
$ sudo xl sched-credit
Cpupool Pool-0: tslice=30ms ratelimit=1000us
Name                                ID Weight  Cap
Domain-0                             0    512    0
Wheezy                               3    256    0
Download the latest kernel version you would like to use and extract the contents of the archive. You can try pulling your configuration via “make oldconfig“, so your old settings are migrated and only new or changed options are presented to you to select. Then to make sure everything is ok, run “make menuconfig” or “make xconfig” to determine if the feature/module setting are appropriate for you. I left everything alone with the exception of enabling the Xen features as described below. make oldconfig is clever, it can do its job between different versions of kernel although just issuing a “make menuconfig” is probably also fine.
$ cd linux-3.9.2
$ make oldconfig
scripts/kconfig/conf --oldconfig Kconfig
#
# configuration written to .config
#
Alternatively just use the defaults and add the required Xen features:
$ cd linux-3.9.2
$ make menuconfig
Location:
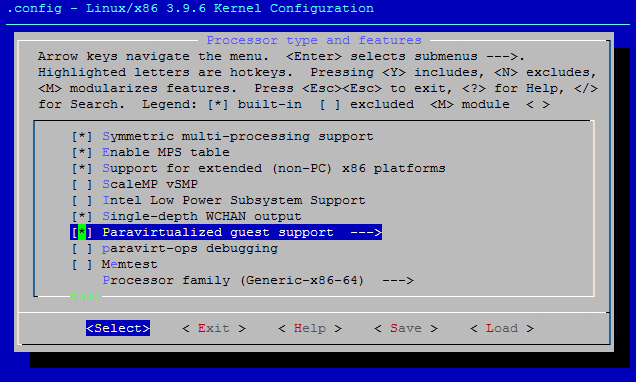
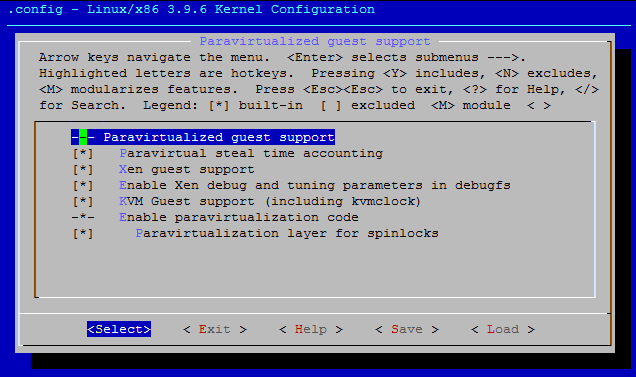
-> Processor type and features
-> Paravirtualized guest support
Select all features.

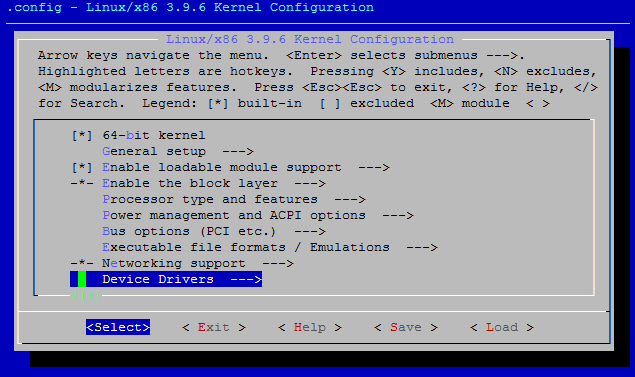
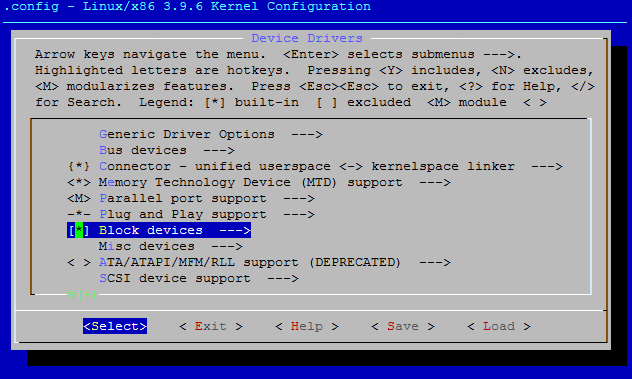
Location:
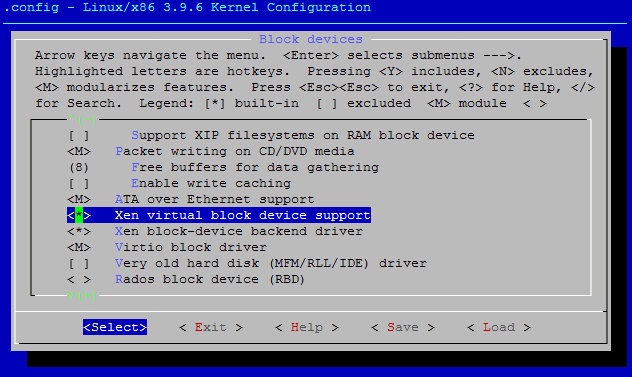
-> Device Drivers
-> Block devices
Select the two features “Xen virtual block device support” and “Xen
block-device backend driver”
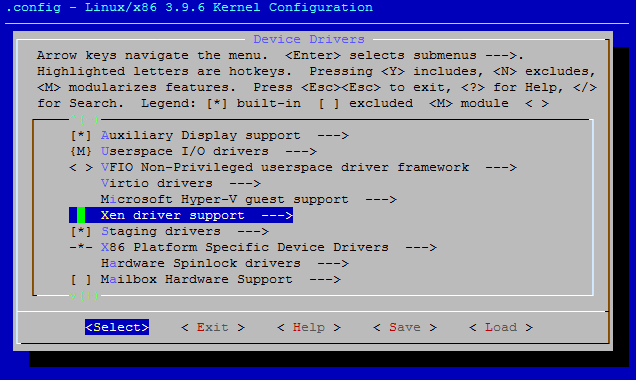
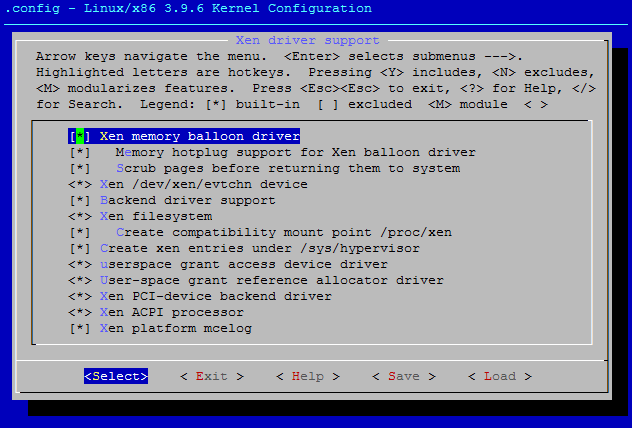
Location:
-> Device Drivers
-> Xen driver support
Select all features.
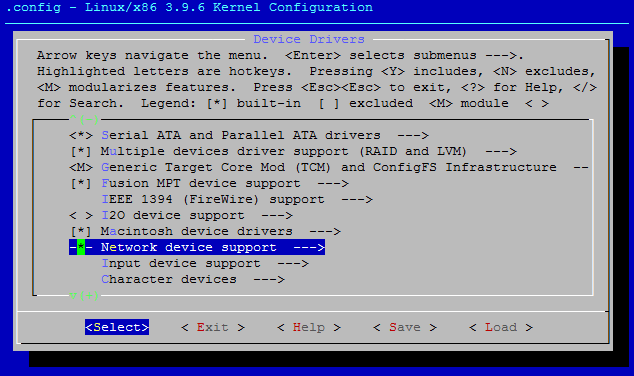
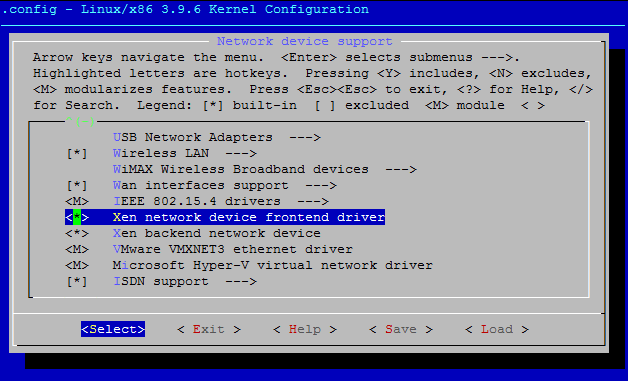
Location:
-> Device Drivers
-> Network device support
Select the two features “Xen network device frontend driver” and “Xen
backend network device”
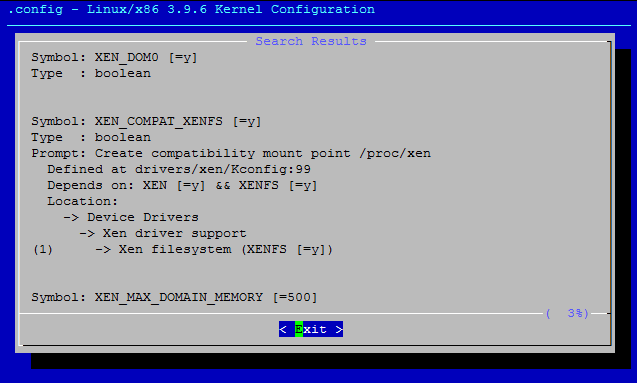
Lastly, you can search using “/” when at the root menu to see what you have enabled:
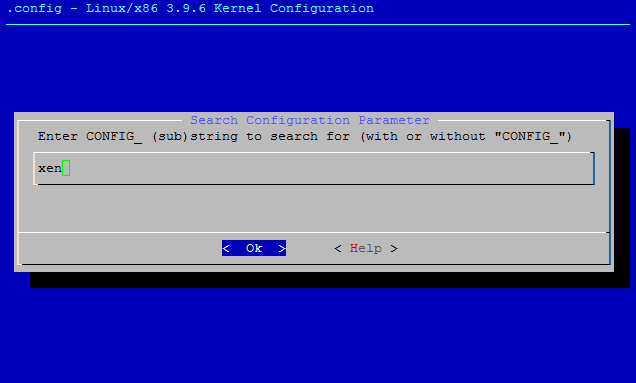
Which will provide you a list of features that have been selected but it may be easier to grep through the .config as shown in the next command.
You can use “grep” to ensure you should have similar values for your Xen settings after running menu config.
$ grep XEN .config
CONFIG_XEN=y
CONFIG_XEN_DOM0=y
CONFIG_XEN_PRIVILEGED_GUEST=y
CONFIG_XEN_PVHVM=y
CONFIG_XEN_MAX_DOMAIN_MEMORY=500
CONFIG_XEN_SAVE_RESTORE=y
CONFIG_XEN_DEBUG_FS=y
CONFIG_PCI_XEN=y
CONFIG_XEN_PCIDEV_FRONTEND=y
CONFIG_XEN_BLKDEV_FRONTEND=y
CONFIG_XEN_BLKDEV_BACKEND=y
CONFIG_NETXEN_NIC=m
CONFIG_XEN_NETDEV_FRONTEND=y
CONFIG_XEN_NETDEV_BACKEND=y
CONFIG_INPUT_XEN_KBDDEV_FRONTEND=y
CONFIG_HVC_XEN=y
CONFIG_HVC_XEN_FRONTEND=y
# CONFIG_XEN_WDT is not set
CONFIG_XEN_FBDEV_FRONTEND=y
CONFIG_XEN_BALLOON=y
CONFIG_XEN_BALLOON_MEMORY_HOTPLUG=y
CONFIG_XEN_SCRUB_PAGES=y
CONFIG_XEN_DEV_EVTCHN=y
CONFIG_XEN_BACKEND=y
CONFIG_XENFS=y
CONFIG_XEN_COMPAT_XENFS=y
CONFIG_XEN_SYS_HYPERVISOR=y
CONFIG_XEN_XENBUS_FRONTEND=y
CONFIG_XEN_GNTDEV=y
CONFIG_XEN_GRANT_DEV_ALLOC=y
CONFIG_SWIOTLB_XEN=y
CONFIG_XEN_PCIDEV_BACKEND=y
CONFIG_XEN_PRIVCMD=y
CONFIG_XEN_ACPI_PROCESSOR=y
CONFIG_XEN_MCE_LOG=y
CONFIG_XEN_HAVE_PVMMU=y
If all of the Xen features are enabled, move on to compiling.
$ make bzImage
$ make modules
$ sudo make modules_install
Copy the images to the appropriate locations.
$ sudo cp -a arch/x86/boot/bzImage /boot/vmlinuz-3.9.2
$ sudo cp -a System.map /boot/System.map-3.9.2
$ sudo cp -a .config /boot/config-3.9.2
$ sudo depmod -a
$ sudo mkinitrd /boot/initrd.img-3.9.2 3.9.2
Add a grub entry to /etc/grub.conf, make sure it is the first entry but leave an existing distribution kernel entry to fall back to if there are problems:
title Xen 4.2.1 / Kernel 3.9.2
root (hd0,0)
kernel /xen.gz
module /vmlinuz-3.9.2
module /initrd.img-3.9.2
Reboot the system and you should be able to run the following command to verify that your efforts have paid off.
$ sudo xl list
Name                                        ID   Mem VCPUs      State   Time(s)
Domain-0                                     0  2048     1     r-----     941.4
Now you can move on to setting up a guest as described in Creating Debian guests on Xen using parition based filesystem.
If you are unable to reboot using your new kernel, revert back to a distro kernel and double check that you have done everything as described. If something is not clear or could be improved upon, let me know by leaving a comment below.
Comments
comments powered by Disqus